
Everyone has that one dish that sparks nostalgia, warmth, and comfort—a culinary time machine to special moments shared with loved ones. For me, it’s Grandma’s Million Dollar Pie. A slice of this creamy, sweet, and perfectly refreshing dessert does more than satisfy a craving—it tells a story. This pie, loved by all who taste it, has a legacy that transcends generations. Whether you’re a skilled home baker or someone simply looking for a foolproof recipe to wow a crowd, you’re in for a treat. This blog will walk you through the history, ingredients, and steps to create a dessert worthy of being called “Million Dollar Pie.”
The Legend of the Million Dollar Pie
The origins of the Million Dollar Pie are surrounded by mystery, a bit of lore, and a lot of love. Some attribute its creation to Southern comfort food traditions, while others argue it emerged during the mid-20th century as part of the “no-bake” dessert craze. My Grandma’s version, however, carries its own unique charm. She always swore the “million-dollar” name came from the way people lit up after a single bite—it made them feel like a million bucks. Passed down through our family like a treasured heirloom, Grandma’s recipe has become a dessert synonymous with celebrations, summer gatherings, and indulgent Sunday afternoons.
What makes this pie so special is its simplicity. It comprises affordable, everyday ingredients combined in a way that delivers luxury both in flavor and texture. There’s no need for elaborate techniques or hours in the kitchen. Just a little effort, a lot of heart, and you’ll have a dessert that’s as memorable as Grandma herself.
Ingredient Breakdown
Every ingredient in Grandma’s Million Dollar Pie plays an essential role in creating that iconic taste. Here’s a closer look at the key players:
1. Graham Cracker Crust
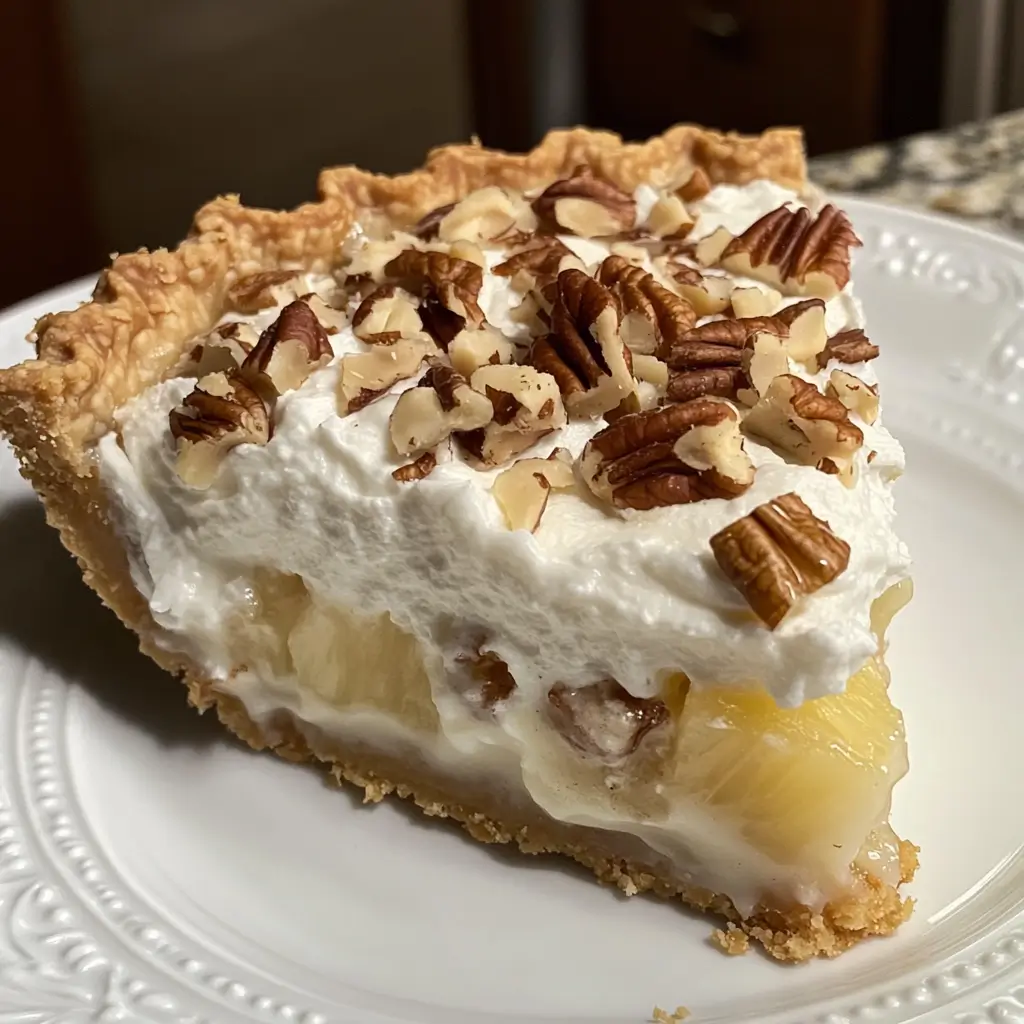
The pie starts with a classic graham cracker crust, providing a slightly sweet and crumbly base. Its subtle nuttiness perfectly complements the creamy filling. You can either go for store-bought crust for convenience or make your own by combining crushed graham crackers, melted butter, and sugar.
2. Sweetened Condensed Milk
Sweetened condensed milk is the magic worker in this recipe. It lends sweetness, creaminess, and structure to the filling without requiring additional sugar or heavy cream.
3. Crushed Pineapple
Pineapple brings a bright, tangy punch that balances the richness of the milk. The crushed texture disperses tangy bursts throughout the pie, adding a refreshing element to each bite.
4. Whipped Topping (Cool Whip)
Light and airy, whipped topping creates a signature fluffy texture. While some prefer fresh whipped cream, the stabilized nature of Cool Whip holds up better over time, especially for make-ahead desserts.
5. Chopped Pecans
For texture and depth, chopped pecans are folded into the filling. They provide a delightful crunch and a slightly earthy flavor.
6. Shredded Coconut (optional)
A touch of coconut adds a tropical twist and enhances the overall sweetness. While optional, it’s highly recommended if you enjoy faint nutty undertones.
Each ingredient has its own charm, but together, they create a balanced pie bursting with flavor and texture.
Step-by-Step Instructions
Creating Grandma’s Million Dollar Pie is straightforward—even beginner bakers will find this recipe approachable. Here’s how to make it:
1: Gather Your Ingredients
- 1 pre-made graham cracker crust (or make your own, see tips below)
- 1 can (14 oz) of sweetened condensed milk
- 1 can (20 oz) of crushed pineapple, drained
- 1 tub (8 oz) of whipped topping (Cool Whip)
- ½ cup of chopped pecans
- ¼ cup of shredded coconut (optional)
2: Combine the Filling
- Start by draining the crushed pineapple thoroughly to avoid a runny filling.
- In a large mixing bowl, combine the sweetened condensed milk, drained pineapple, chopped pecans, and shredded coconut. Mix until well combined.
- Gently fold in the whipped topping. Take your time with this step to ensure the filling maintains its fluffy texture.
3: Assemble the Pie
- Pour the filling into the graham cracker crust, spreading it evenly with a spatula. Smooth out the top for a clean, polished look.
4: Chill
- Cover the pie with plastic wrap or a pie cover.
- Refrigerate for at least 4 hours, though overnight is ideal for the best texture and flavor.
5: Serve
- Once chilled, remove the pie from the fridge. Slice and serve immediately. For an extra touch, garnish with additional pecans, coconut flakes, or even a maraschino cherry on top.
Tips & Tricks for Success
- Crust Options: Feeling ambitious? Make your graham cracker crust by combining 10 crushed graham crackers, 6 tablespoons of melted butter, and 2 tablespoons of sugar. Press this mixture into a pie dish and bake at 350°F for 10 minutes, then cool before adding the filling.
- Avoid Overmixing: When folding in the whipped topping, use a gentle hand to maintain the light, airy consistency of the pie.
- Drain the Pineapple Thoroughly: Excess liquid can make the filling watery. Use a fine mesh strainer to press out additional juice.
- Make it Mini: Turn this recipe into individual servings by assembling the pie in mason jars or ramekins.
Variations & Adaptations
While Grandma’s classic recipe doesn’t need changing, there’s plenty of room to put your own spin on it:
- Fruit Swaps: Replace pineapple with canned mandarin oranges or mango for a different fruity twist.
- Crust Upgrades: Try a chocolate cookie crust for a rich, decadent variation.
- Add Zest: Mix in some lemon or lime zest for added brightness.
- Dairy-Free Options: Use coconut milk-based whipped topping and a plant-based condensed milk for a non-dairy version.
- Alcohol Infusion: Fold in a splash of rum or coconut liqueur for a boozy adult dessert.
Feel free to get creative—this recipe is versatile enough to handle your brainstorms!
Share Your Baking Story
Grandma always said, “A pie isn’t just for eating—it’s for sharing.” And we’d love to hear from you! Have you tried Grandma’s Million Dollar Pie? Did you add your own twist? Snap a photo of your creation, post it to Instagram, and tag us with #MillionDollarPie. A community of dessert lovers awaits your take on this iconic treat.
Your feedback and creativity keep these timeless recipes alive, and there’s nothing we love more than celebrating with fellow bakers.
Why You’ll Want to Make This Pie Today
From its creamy filling to the perfect balance of textures, Grandma’s Million Dollar Pie is more than just a dessert—it’s a treasure trove of memories, flavors, and family love. Whether you’re an experienced baker or new to the kitchen, this pie promises to bring smiles and satisfy taste buds with every bite.
Give it a try and see why this dessert has stood the test of time. And don’t forget to share your experience with us. Who knows? Your version of the Million Dollar Pie might just gain its own legendary status. Happy baking!
Frequently Asked Questions (FAQs)
Here are some common questions and answers to help you perfect your Million Dollar Pie:
1. Can I make this pie ahead of time?
Absolutely! This pie is perfect for making ahead as it requires chilling for optimal texture and flavor. You can prepare it the day before and store it in the refrigerator until you’re ready to serve.
2. How long does Million Dollar Pie last in the refrigerator?
Stored properly in an airtight container or covered with plastic wrap, the pie can last up to 3-4 days in the refrigerator. However, it’s best enjoyed within the first 1-2 days for maximum freshness.
3. Can I freeze this pie?
Yes, you can! Wrap the pie tightly in plastic wrap and then in aluminum foil before freezing. It will keep well for up to 2 months. For serving, thaw the pie in the refrigerator overnight.
4. What if I don’t like pecans or coconut?
No problem! You can easily leave these ingredients out or substitute them with something else you enjoy, such as walnuts or mini chocolate chips for a sweeter twist.
5. Can I use fresh pineapple instead of canned?
While fresh pineapple might lend a slightly more natural flavor, it contains enzymes that may prevent the filling from setting properly unless cooked first. Canned pineapple is recommended because it’s already been processed to work perfectly in this recipe.
6. What’s the best way to garnish the pie?
Get creative! A dollop of whipped cream, a sprinkle of chopped pecans, or a few coconut flakes are classic options. For a festive touch, consider decorating the pie with maraschino cherries or fresh mint leaves.
7. Is this pie gluten-free?
It depends on the crust you use! Many pre-made graham cracker crusts contain gluten, but you can find gluten-free versions or make your own using gluten-free graham crackers.
Feel free to reach out with any additional questions. We’re here to help make your baking experience as stress-free and enjoyable as possible! Happy baking!
Conclusion
We hope this guide has answered all your questions and inspired you to try your hand at making this delicious pie. With its simple ingredients and versatile options, it’s a dessert that anyone can enjoy. Whether you’re baking for a holiday gathering, a potluck, or just a cozy night at home, this pie is sure to be a crowd-pleaser. Thank you for joining us on this baking adventure—happy baking, and don’t forget to share your creations with us!