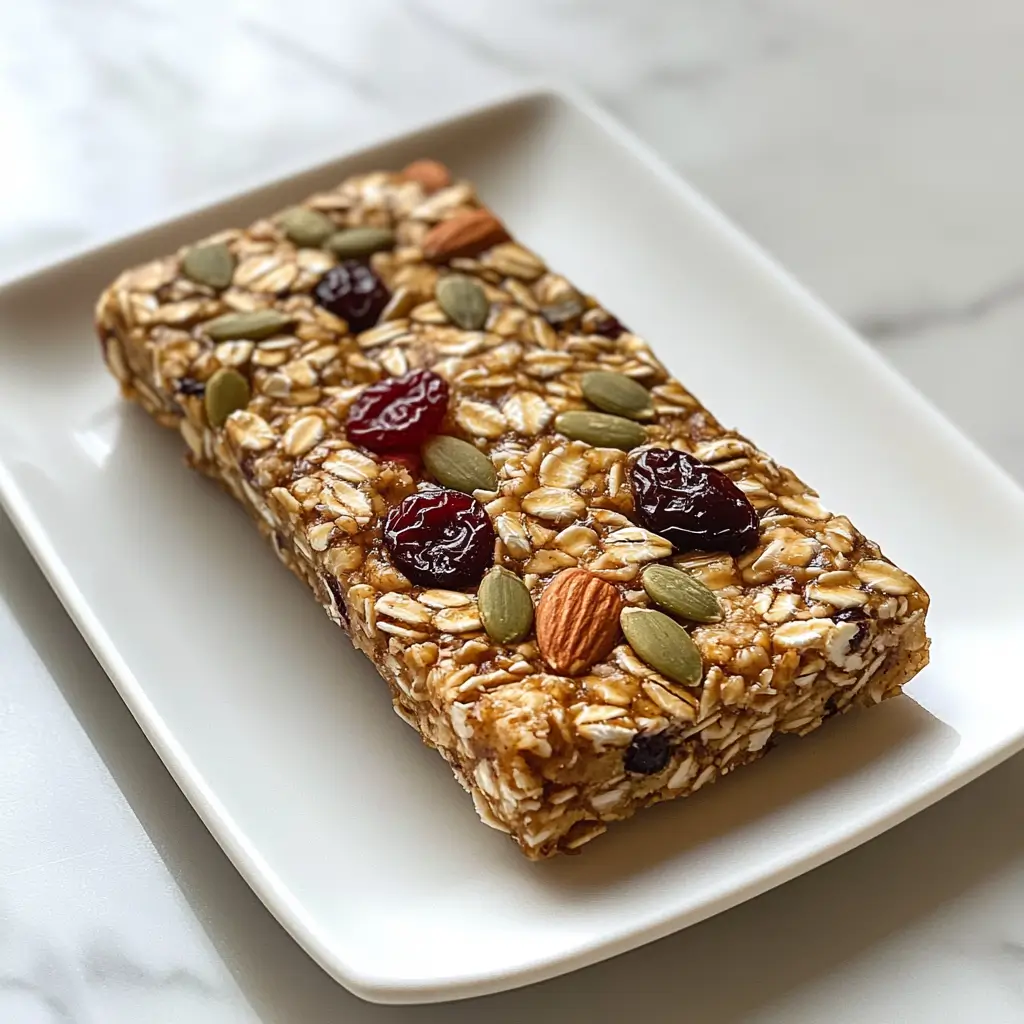
granola Bar with Oats, are the go-to snack for anyone seeking a quick, nutritious, and satisfying bite. Whether you’re a health enthusiast focused on clean eating, a busy professional needing fuel on the go, or simply someone who loves a good, crunchy snack, granola bars tick all the boxes. While store-bought options are convenient, they often come with added sugars, preservatives, and unnecessary fillers.
That’s where homemade granola bars come in. They’re healthier, highly customizable, and surprisingly easy to make. The star ingredient? Oats—the nutritional powerhouse that transforms these bars into an energy-packed, wholesome treat.
This post will guide you through the benefits of oats, provide a foolproof granola bar recipe, offer step-by-step instructions, and explore ways to personalize your bars to suit your tastes.
The Health Benefits of Oats
Before jumping into the recipe, it’s essential to understand why oats are such a crucial component in granola bars.
Packed with Nutritional Goodness
Oats are loaded with essential nutrients. They’re rich in fiber, particularly beta-glucan, which helps lower bad cholesterol (LDL) and promotes heart health. They also provide a good source of protein, iron, zinc, and magnesium, all of which contribute to overall well-being.
Promotes Sustained Energy
Unlike processed carbs, oats are a complex carbohydrate that digests slowly, keeping your blood sugar levels stable and providing long-lasting energy. This makes oats an ideal base for a snack that fuels your busiest days.
Supports Digestive Health
Thanks to their high fiber content, oats can help prevent constipation and improve gut health. If you’re looking for a snack that keeps you full and your digestion smooth, oats are your best bet.
Great for Weight Management
Their fiber content also plays a role in appetite control. Granola bars made with oats can help curb snack cravings, making them a useful addition to a balanced diet.
Essential Ingredients for Homemade Granola Bars
Now that you know why oats are such a fantastic ingredient, here’s what you’ll need to create your own granola bars at home.
- Rolled Oats (2 cups): The base of the granola bar, providing texture and nutrition.
- Honey or Maple Syrup (1/2 cup): A natural sweetener that binds the ingredients together.
- Nut Butter (1/2 cup): Adds creaminess and a rich, healthy fat profile. Almond or peanut butter works well.
- Chopped Nuts (1/2 cup): Almonds, walnuts, or cashews provide crunch and healthy fats.
- Dried Fruit (1/2 cup): Raisins, cranberries, or apricots add a natural sweetness.
- Dark Chocolate Chips (1/4 cup): Optional, but a small sprinkle of chocolate adds decadence without overpowering the health factor.
- Vanilla Extract (1 tsp): Enhances the overall flavor profile.
- Salt (1/4 tsp): Balances the sweetness and brings out the flavors.
Step-by-Step Instructions
Creating your own granola bars is simpler than you might think. Follow these steps for the perfect batch every time.
1: Prepare the Base
- Preheat your oven to 350°F (175°C).
- Spread the rolled oats and chopped nuts on a baking sheet. Toast them for 8–10 minutes to enhance their flavor.
2: Make the Binding Mixture
- While the oats are toasting, heat the honey (or maple syrup) and nut butter in a small saucepan over low heat. Stir until the ingredients combine into a smooth, gooey mixture.
- Remove from heat and mix in the vanilla extract and salt.
3: Combine and Mix
- Transfer the toasted oats and nuts to a large mixing bowl, then add the dried fruit and optional chocolate chips.
- Pour the warm honey-nut butter mixture over the dry ingredients. Stir with a spatula until everything is evenly coated.
4: Shape and Set
- Line an 8×8-inch baking dish with parchment paper. Pour the granola mixture into the dish and press it down firmly with the back of a spoon.
- Place the dish in the fridge for 1–2 hours to set.
5: Slice and Serve
- Once the mixture has hardened, use a sharp knife to cut it into bar-sized portions. Store the granola bars in an airtight container for up to a week (if they last that long!).
Pro Tip: Want crispier bars? Bake them at 350°F for an additional 10 minutes after pressing them into the dish.
Customizing Your Granola Bars
One of the best parts of making granola Bar with Oats at home is the ability to customize them to suit your preferences. Here are some ideas to upgrade your bars:
Different Fillings
- Swap out chopped nuts for seeds like sunflower seeds, chia seeds, or pumpkin seeds.
- For a tropical twist, add shredded coconut or dried pineapple.
Flavored Add-Ins
- Add a sprinkle of cinnamon, nutmeg, or cocoa powder for extra flavor.
- Love coffee? Mix in 1 tsp of instant espresso powder into the binding mixture for a mocha-inspired snack.
Dietary Adjustments
- Make it vegan by substituting honey with maple syrup or agave nectar.
- Use gluten-free oats if you’re sensitive to gluten.
Protein Boost
- Add a scoop of protein powder or collagen to the mix for a post-workout snack.
Creative Shapes
- Roll the mixture into small bite-sized balls for an easy snack on the go.
- Press it into silicone molds for fun shapes that kids will love.
Enjoy and Share the Granola Bar Love
With their impressive health benefits of granola Bar with Oats at home, ease of preparation, and endless customization options, homemade granola bars with oats are a must-try for anyone looking to snack smarter. They’re a perfect fit for busy mornings, post-workout fuel, or a mid-afternoon energy boost.
Start experimenting with your favorite flavors and ingredients to make them truly your own. The beauty of these bars lies in their versatility, allowing you to meet your specific dietary needs and satisfy your taste buds.
Why settle for less when you can create the best? Try this simple recipe today and see for yourself how easy it is to enjoy a healthier, personalized snack option. Your stomach—and your schedule—will thank you.
Storing Your Homemade Granola Bars
Proper storage is key to keeping your granola bars fresh and flavorful. Once you’ve cut your bars into the desired portions, here are a few tips to ensure they stay at their best:
- Room Temperature: Store your granola bars in an airtight container at room temperature for up to one week. Place parchment paper between layers to prevent them from sticking together.
- Refrigeration: If you prefer a firmer texture or live in a warm climate, refrigerate the bars. They can last up to two weeks in the fridge while retaining their flavor and structure.
- Freezing: For longer storage, freeze individual bars in a resealable freezer bag or wrap them in plastic wrap. They’ll stay fresh for up to three months. Simply thaw for a few minutes at room temperature before eating.
By following these simple steps, you’ll ensure your homemade granola bars remain a convenient, go-to snack without losing their delicious taste or nutritional value.
Bars That Crumble Too Easily
If your bars fall apart when you cut or handle them, it’s likely due to an imbalance in the binding mixture. Try the following solutions:
- Increase the Binding Ingredients: Add a bit more honey, maple syrup, or nut butter to ensure the mixture sticks together.
- Press Firmly: Make sure you compact the mixture tightly into the pan before allowing it to set. The more compressed it is, the sturdier the bars will be.
- Chill Longer: Allow the bars to set in the fridge for a bit longer to ensure they harden properly before slicing.
Too Sticky or Chewy
If your bars turn out too sticky or chewy, it might be due to overusing liquid ingredients. To fix this:
- Cut back slightly on the honey, syrup, or nut butter in your binding mixture.
- Make sure to follow the recipe quantities and avoid adding excess sweeteners during mixing.
Bars That Are Too Hard
If your granola bars feel more like a brick than a snack, they might be overbaked or chilled for too long. To prevent this:
- Reduce additional bake time if you opt for crispy bars. Ten minutes after pressing the mixture is usually enough.
- Avoid chilling the bars for an excessively long time in the fridge or freezer, as this can overly harden their texture.
Uneven Mixing
If some bites seem packed with flavor while others are bland, uneven mixing could be the culprit. To fix this:
- Use a large mixing bowl and a sturdy spatula to ensure all ingredients are evenly coated with the binding mixture. Don’t rush the process—take your time to incorporate everything thoroughly.
By understanding these common pitfalls and knowing how to troubleshoot them, you can perfect the art of making granola bars every time.
Get Inspired by Seasonal Ingredients
One of the most fun aspects of crafting homemade granola Bar with Oats at home, is the ability to celebrate seasonal flavors. Here are a few ideas to inspire your next batch based on the time of year:
- Spring: Incorporate ingredients like dried strawberries, lemon zest, or pistachios for a fresh and vibrant taste.
- Summer: Try adding dried mango, coconut flakes, or a hint of lime for a tropical vibe.
- Fall: Use cinnamon, dried apples, and pumpkin seeds for a warm, comforting flavor inspired by autumn.
- Winter: Go for a festive twist with dried cranberries, chopped walnuts, and a pinch of nutmeg or ginger.
conclusion
Homemade granola Bar with Oats at home are a simple, delicious, and versatile snack that can be tailored to suit any taste or season. By incorporating wholesome ingredients and experimenting with seasonal flavors, you can create something truly unique and nourishing. Not only do they provide a healthier alternative to store-bought options, but they also allow you to enjoy the satisfaction of making something with your own hands. Whether for yourself or to share with loved ones, homemade granola bars are a delightful way to combine creativity, health, and flavor in every bite.

